Have you ever wondered how to transform your device into a high-quality webcam? The latest iPhone model can do just that! With its advanced camera capabilities, it offers superior video quality compared to standard laptop cameras.
Many remote workers and content creators are making the switch to leverage this powerful tool. The iPhone’s camera system, combined with the innovative Continuity Camera feature, allows for seamless video calls and streaming.
Imagine enjoying crystal-clear video at up to 1080p resolution, whether you’re connecting wirelessly or through a USB. This guide will walk you through the steps to configure your device effectively, unlocking its full potential for video conferencing and content creation.
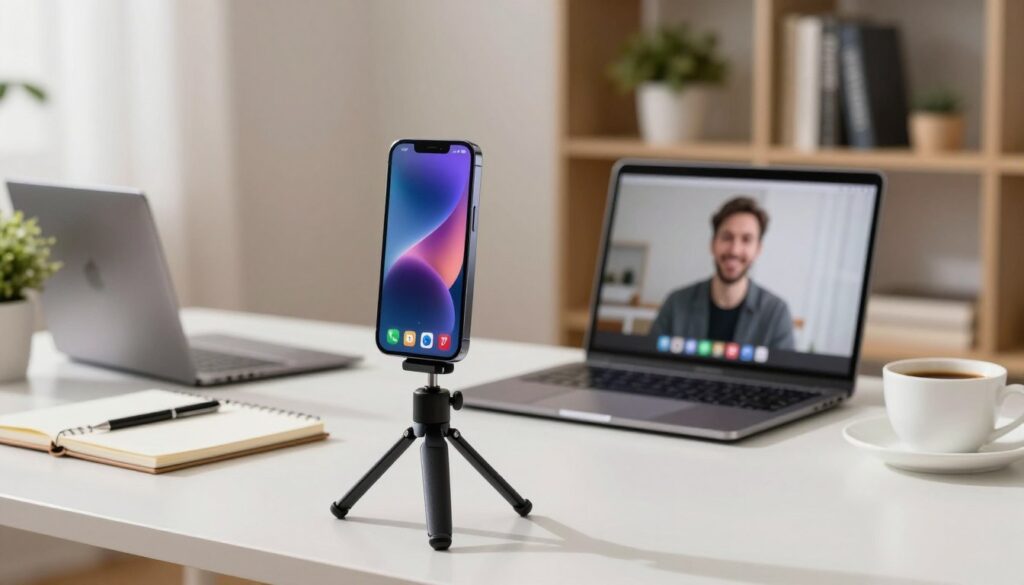
Understanding the Benefits and User Intent of Using iPhone 17 as a Webcam
Transforming your smartphone into a high-quality webcam can elevate your video experience. The iPhone 17 offers remarkable advantages that make it a top choice for webcam use. Its rear camera utilizes a larger sensor compared to standard webcams, allowing it to capture more light and detail.
Traditional webcams often struggle in low-light conditions due to their tiny sensors. In contrast, the iPhone performs millions of calculations each second to optimize video quality. This includes adjusting white balance, reducing noise, and enhancing skin tones in real time. The result is a clear, vibrant image that can significantly improve your video calls.

Why choose your iPhone 17 for webcam use?
The iPhone 17’s rear camera dramatically outperforms standard built-in webcams. Its larger sensor captures significantly more light, producing cleaner and more detailed video, even in challenging lighting conditions. This makes it an ideal choice for anyone looking to enhance their video quality.
What you can expect in video quality improvements
When you opt for the iPhone 17, you can expect tangible video quality improvements. This includes sharper image clarity, better dynamic range, and more accurate color reproduction. These enhancements contrast sharply with the grainy footage often seen with built-in laptop cameras.
User scenarios: video calls, streaming, and recording
There are many scenarios where using your iPhone 17 as a webcam shines. Daily video conferencing on platforms like Zoom and Google Meet becomes more professional. Live streaming on Twitch or YouTube can also benefit from the superior quality. Furthermore, content creators often choose the iPhone for recording high-quality podcasts and tutorials.
In addition, the flexibility of using your iPhone 17 extends to both casual and professional settings. Whether it’s a virtual family gathering or an important business presentation, the quality remains impressive. With Continuity Camera, you can enjoy seamless integration at 1080p, while advanced users can unlock 4K capabilities with third-party apps.
Requirements and Compatibility for Using Your iPhone 17 as a Webcam
To transform your device into a high-quality video source, you need to check a few essential requirements. Understanding these prerequisites will ensure a smooth setup and optimal performance when using the Continuity Camera feature.
Hardware prerequisites: iPhone 17, Mac, and mounts
First, verify that your hardware meets all prerequisites. You need an iPhone 17 running iOS 16 or later, paired with a Mac computer equipped with macOS Ventura 13.0 or newer. These are the minimum system requirements for the Continuity Camera functionality.
Additionally, consider investing in a proper mounting solution. A stable mount is essential for positioning your iPhone in landscape orientation with the rear camera facing you. For MacBook users, the Belkin iPhone Mount with MagSafe is a great option. If you have a desktop Mac, any tripod that aligns the phone at eye level will work well.
Software prerequisites: iOS 16+, macOS Ventura or later
Next, ensure both your iPhone 17 and Mac are signed into the same Apple ID account. Two-factor authentication must be enabled for a secure connection between your devices. This step is crucial for establishing trust and ensuring a seamless experience.
Network and connectivity needs: Wi-Fi, Bluetooth, USB cable option
Confirm that Wi-Fi and Bluetooth are activated on both devices. These wireless technologies work together to create the seamless Continuity Camera connection without any cables. However, if you prefer a more stable setup, consider using a USB cable connection. This option is especially useful during extended video calls or when Wi-Fi interference may occur.
Apple ID and security requirements
Finally, check that your iPhone 17 has the Continuity Camera setting enabled. Navigate to Settings, then General, then AirPlay and Continuity, and toggle the Continuity Camera switch to the on position. When connecting via USB, you may need to tap Trust on your iPhone and click Allow on your Mac when prompted. Be prepared to enter your device passcode to authorize the connection.

Setting Up Continuity Camera to Use Your iPhone 17 as a Webcam
Setting up your device to serve as a high-quality webcam can enhance your video calls. To begin, you need to enable the Continuity Camera feature on your iPhone. This feature allows seamless integration between your iPhone and Mac, ensuring a smooth video experience.
Enabling Continuity Camera on your iPhone
Start by navigating to the Settings app on your iPhone. Tap on General, then select AirPlay and Continuity. Make sure the Continuity Camera toggle is switched to the active position. This simple step activates the feature and prepares your device for use.
Preparing your iPhone for webcam use: mounting and positioning
Next, prepare your iPhone for webcam use. Secure it in a compatible mount or tripod in landscape orientation. Ensure the rear camera lenses are facing you, while the screen faces away. This setup captures the best video quality during your calls.
Position your mounted device within 30 feet of your Mac and at eye level. This placement creates a natural and engaging camera angle, keeping the device stable throughout your session.
Connecting your iPhone to your Mac: wireless and wired options
You can choose between a wireless connection for convenience or a wired USB cable connection for maximum stability. The wireless option allows freedom of movement, while the wired connection is ideal for important meetings or long recording sessions.
To connect via USB, use the cable that came with your device. When prompted on your iPhone, tap Trust and enter your passcode. Click Allow on your Mac if an accessory connection alert appears.
Selecting iPhone 17 as the camera source on Mac apps
Open any compatible application on your Mac, such as FaceTime, Zoom, or Photo Booth. Access the video settings or camera menu within that app to select your iPhone as the camera source. Look for your device listed as iPhone Camera in the selection menu.
Once selected, your iPhone will activate its rear camera and begin streaming high-quality video to your Mac. Verify the connection by checking for a green LED indicator next to your camera lens and a confirmation message on your iPhone screen.
How to Use iPhone 17 as webcam: Step-by-Step Guide
Discover how to easily convert your smartphone into a top-notch webcam for your video needs. This guide will help you navigate the process smoothly, ensuring high-quality video streaming.
Begin by launching any compatible video conferencing or streaming application on your Mac. Popular options include FaceTime, Zoom, Google Meet, Microsoft Teams, QuickTime Player, and OBS Studio. All of these apps support the Continuity Camera feature.
Launching compatible video and streaming apps
Open your chosen app and navigate to the video settings or preferences menu. Here, you will find a camera selection dropdown. Your iPhone should appear as an available camera source labeled “iPhone Camera.”
Choosing your iPhone camera in app settings
Select your iPhone from the camera list. Once selected, the rear camera activates, delivering a crisp, high-quality video feed to your Mac. You can see this immediately in the app’s preview window.
Controlling video and audio streaming from your iPhone
Control your video and audio streaming directly from your iPhone. To pause the feed, tap the Pause button on the screen. Alternatively, unlock your iPhone and swipe up to pause without ending the connection. To resume, simply tap the Resume button or lock your iPhone to automatically restart the camera feed.
You can also manage your audio input. Use your iPhone as a microphone for your Mac by going to System Settings. Navigate to Sound, then Input, and select your iPhone from the list of available sound input devices.
Ending webcam use and disconnecting
To end your webcam session, quit the application on your Mac that was using the camera. This action automatically stops the video stream and returns your iPhone to normal operation. If you need to disconnect manually, tap the Disconnect button on your iPhone screen and confirm the disconnection. This will remove your iPhone from the camera and microphone lists in all apps and system settings.
Enhancing Your Video Quality with Continuity Camera Features
Elevate your video calls by leveraging the powerful features of the Continuity Camera. This innovative technology offers various enhancements that can significantly improve your video quality during calls and streaming sessions.
Using Portrait mode, Studio Light, and Center Stage
While in a video conferencing app on your Mac, click the Control Center icon in the menu bar. Select Video Effects to access options like Center Stage, Portrait mode, and Studio Light.
Center Stage utilizes the ultrawide lens of your device to keep you centered in the frame, even as you move. This feature creates a dynamic and engaging presence during your calls.
Portrait mode adds a soft background blur, drawing attention to your face while minimizing distractions. Studio Light brightens your face and dims the background, mimicking professional studio lighting.
Activating and sharing Desk View for workspace demonstration
Desk View simulates a top-down camera angle to showcase your workspace. To activate this feature, position your device horizontally in a mount at the top of your display.
Click the Desk View button in Control Center or during a FaceTime call. You can then share your Desk View, allowing you to demonstrate products or sketch ideas on paper, adding value to your presentations.
Tips for stable mounting and optimal lighting
For the best results, use a secure mount to keep your device stable. Position it at eye level in landscape orientation, ensuring the rear camera is unobstructed and facing you directly.
Good lighting is crucial for quality video. Avoid placing your device too close to your face, and ensure the area is well-lit to enhance visibility during your calls.
Managing battery life during extended use
Long video calls can drain your battery quickly. To manage battery life, connect your device to a power source using a USB cable during extended use.
Features like Center Stage and Studio Light consume significant power, so keeping your device charged is essential for uninterrupted sessions.
Alternative Methods and Third-Party Apps for Using iPhone as Webcam
Exploring alternative methods can significantly enhance your video streaming experience. While the Continuity Camera feature offers great quality, there are additional tools that can elevate your video quality even further.
Using Riverside for 4K recording and advanced streaming
Riverside is a powerful alternative that unlocks the full 4K video recording capability of your smartphone camera. This feature far surpasses the 1080p limitation of Continuity Camera, making it ideal for professional content creation and high-quality streaming.
Riverside records video locally on your device, ensuring that your recording quality remains pristine and unaffected by internet connection fluctuations. It also provides separate audio and video tracks, which simplifies post-production editing.
To set up Riverside, download the iOS app on your device and log into the same account on both your mobile device and desktop browser. Connect your smartphone as a second camera source within your studio dashboard for seamless integration.
Third-party apps for Windows users: Iriun, EpocCam, Camo
If you are a Windows user unable to utilize Continuity Camera, there are several third-party apps available. Iriun Webcam is a free solution that requires installing the Iriun software on your PC and the companion app on your device. Ensure both devices are connected to the same Wi-Fi network for wireless webcam functionality.
EpocCam and Camo are additional options that allow you to use your smartphone as a webcam on Windows PCs. Each app offers unique features, such as front camera support and advanced video adjustments not available in Continuity Camera.
Pros and cons of third-party apps vs. Continuity Camera
When comparing the advantages of Continuity Camera, it stands out for its seamless native integration, zero cost, and automatic setup. In contrast, third-party apps may offer higher resolutions and cross-platform compatibility, including access to the front-facing camera.
However, consider the potential drawbacks of third-party apps. These may include video latency, watermarks on free versions, subscription costs for premium features, and the need to install and configure additional software on both your device and computer.
Ultimately, make an informed decision based on your specific needs. If you prioritize the simplicity and reliability of Continuity Camera for everyday use, it may be the best choice. Alternatively, if you require advanced features and Windows compatibility, third-party app solutions could be the way to go.
Troubleshooting Common Issues When Using Your iPhone 17 as a Webcam
Using your device as a high-quality webcam can be a game-changer. However, you might encounter some common issues along the way. Here’s how to troubleshoot and resolve them effectively.
Resolving connectivity and recognition problems
First, make sure both your iPhone and Mac have Wi-Fi and Bluetooth turned on. They should be within 30 feet of each other for a reliable connection. If issues persist, connect your iPhone to your Mac using a USB cable. When prompted, tap Trust on your iPhone and click Allow on your Mac. Enter your device passcode if requested.
Restart both devices to clear any temporary glitches. Toggling Wi-Fi and Bluetooth off and back on can refresh the connection and help re-establish the Continuity Camera link. Remember, a green LED indicator next to the camera lens means the Continuity Camera is active.
Improving video quality and reducing lag
If you experience poor video quality, always use the rear camera of your iPhone for the best results. Mount your device on a stable tripod to eliminate any shake. Position a bright, diffused light source in front of you to enhance visibility and reduce grainy footage.
To minimize lag, consider switching from a wireless connection to a wired USB connection. This option provides a more stable data transfer and eliminates interference that can cause frame drops and audio sync issues.
Adjusting permissions and privacy settings
Sometimes, recognition problems can stem from privacy settings. Navigate to System Settings on your Mac, then to Privacy and Security. Check the Camera and Microphone sections to ensure that the apps you want to use have the necessary access permissions.
If issues persist, resetting privacy permissions may help. Ensure that your devices are signed into the same Apple ID with two-factor authentication enabled.
Ensuring your devices meet system requirements
Finally, make sure your devices meet the minimum system requirements. You need an iPhone XR or newer with iOS 16 or later, and a Mac running macOS Ventura or later. Ensure that the Continuity Camera feature is toggled on in your iPhone settings under General, AirPlay, and Continuity.
By following these troubleshooting steps, you can enhance your video calling experience and enjoy seamless streaming with your iPhone as a webcam.
Conclusion
Unlocking the full potential of your device can transform your video calls into a professional experience. By utilizing your smartphone as a webcam, you gain superior video quality compared to standard options. The setup is straightforward for Mac users, requiring just a compatible mount and a few settings adjustments.
Your iPhone 17 can enhance various scenarios, from daily meetings to professional live streams. Features like Center Stage, Portrait mode, and Studio Light elevate your video presence, making every call more engaging.
Windows users can explore third-party apps like Iriun and EpocCam for similar capabilities. Remember to focus on proper mounting, optimal lighting, and power management to ensure uninterrupted performance.
For those seeking the highest quality, consider Riverside for 4K recording. Set up your device today and experience the immediate improvement in your video communication needs. For more information, check out the iPhone 17 user guide.