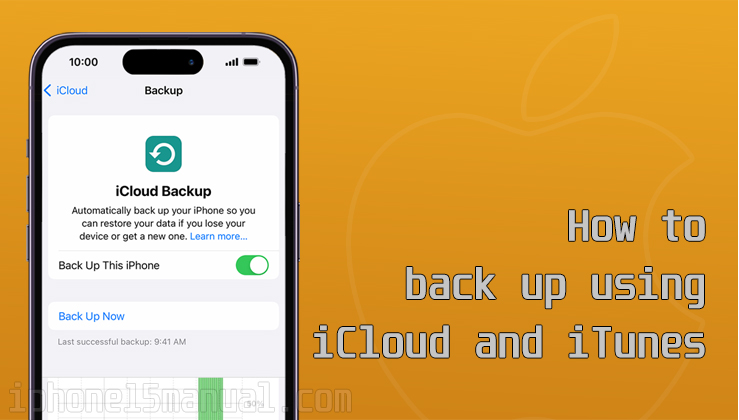
Losing important data on your iPhone can be a nightmare. That’s why it’s crucial to regularly back up your device to ensure that your data is safe and secure. In this guide, we’ll walk you through two methods to back up your iPhone 15: using iCloud and using iTunes. Let’s get started!
A step-by-step guide to Backing Up your iPhone 15
There are several ways to back up an iPhone, including using iCloud or iTunes. Here are the steps for each method.
Steps to Back Up your iPhone 15 using iCloud
To back up your iPhone 15 using iCloud, follow these steps:
- Connect your iPhone 15 to a Wi-Fi hotspot.
- Open the Settings app on your iPhone 15.
- Tap on your Apple ID profile at the top of the Settings menu.
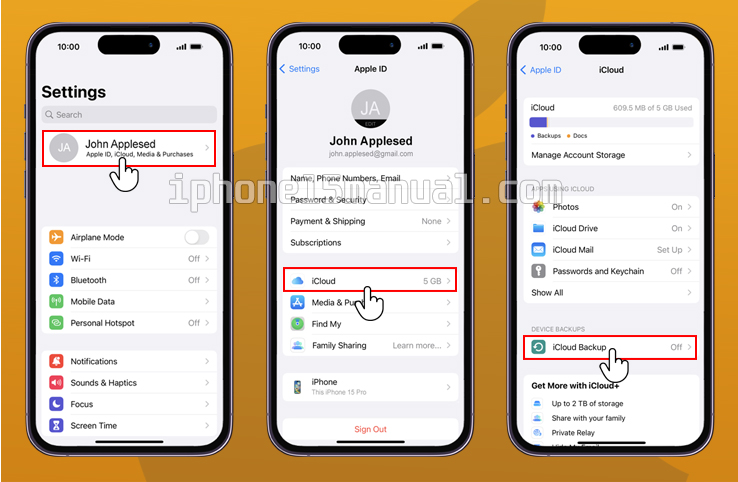
- Scroll down and tap on “iCloud.”
- Tap on “iCloud Backup.”
- Enable iCloud Backup if it’s not already turned on.
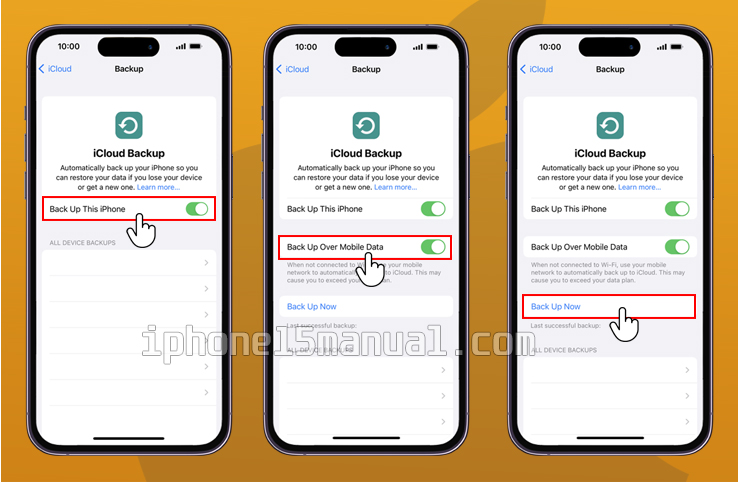
- Tap on “Back Up Now” to initiate the backup process.
- Stay connected to the Wi-Fi network until the backup is complete.
You can check the status of your backup and view the date and time of your last backup in the “iCloud Backup” section of the Settings menu.
It’s important to note that if you don’t have enough iCloud storage space, you may need to upgrade your storage plan to complete the backup.
Remember to keep your device connected to a power source and connected to Wi-Fi during the backup process. It’s also a good idea to regularly check and ensure that iCloud Backup is turned on in your device settings to ensure that your data is continuously backed up.
By following these steps, you can easily back up your iPhone using iCloud and ensure that your data is safe and secure.
Steps to backing up iPhone 15 using iTunes
To backing up your iPhone using iTunes, follow these steps:
- Connect your iPhone to your computer using a USB cable.
- Launch iTunes on your computer. If you don’t have iTunes installed, you can download it from the Apple website.
- If prompted, enter your device passcode or select “Trust This Computer” on your iPhone.
- In the iTunes window, click on the iPhone icon to select your device.
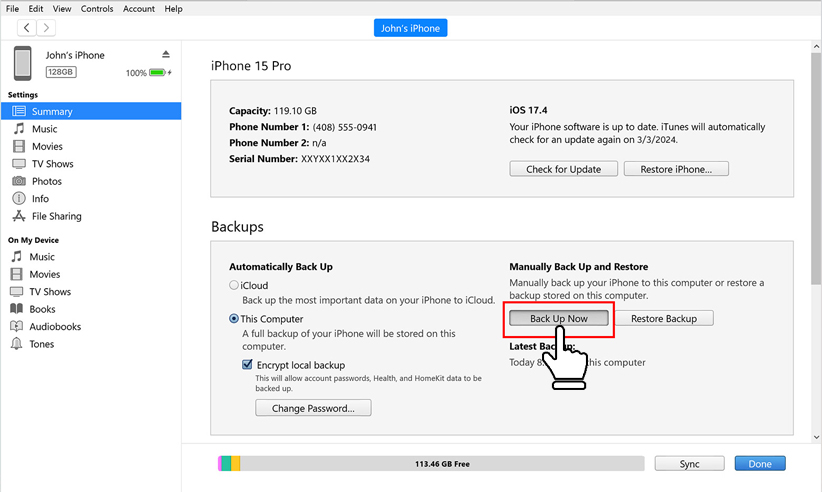
- Under the “Backups” section, select “This computer” to back up your iPhone to your computer.
- If you want to encrypt your backup and protect it with a password, select “Encrypt local backup” and create a memorable password. Remember to save your password somewhere safe, as there’s no way to recover your backups without it.
- Click on “Back Up Now” to initiate the backup process. You can check the status of your backup and view the date and time of your last backup in the “Backups” section of the iTunes window.
It’s important to note that if you’re using a Mac with macOS Catalina or later, you’ll need to use the Finder app instead of iTunes to back up your iPhone 15.
Additionally, unlike iCloud, iTunes backs up all your photos, images, media files not purchased from iTunes, messages, call logs, application data, settings, memos, calendars, and bookmarks.
By following these steps, you can easily back up your iPhone 15 using iTunes and ensure that your data is safe and secure on your computer.
Conclusion
Backing up your iPhone data is essential to protecting your valuable information. By following the steps outlined above, you can ensure that your data is safe and easily recoverable in the event of any unforeseen circumstances.
Whether you choose to use iCloud or iTunes, regular backups will give you peace of mind, knowing that your data is secure. Don’t wait until it’s too late; start backing up your iPhone 15 today!
2 thoughts on “How to Safely Back Up Your iPhone 15: Step-by-Step Guide”